Trap Steering
Description
Trap steering is responsible for the general positioning of the traps and the nanostage.
Usage
Position and moving
All positions of a trap are relative to its own range of motion.
Trap positions are measured in micrometers (µm). The steering’s coordinate system treats the top-left corner as origin, meaning that values increase when moving in top-down or left-right directions.
Speeds are measured in micrometers per second (µm/s).
Moving traps via joystick
By default, you can control the trap by moving the joystick. The trap’s movement speed depends on how much you move the joystick; fully deflecting it will move the trap at high speed, whereas small movements will move the trap slowly. If the speed is locked, the amount of deflection does not impact the trap’s speed. For more details on speed locking, refer to the section “Movement speed”.
Device selector

The selector is used to cycle between traps (1, 2, 3, 4, 1+2, 3+4) and the nanostage. The visible toolbar, Z-slider (if applicable), and waypoints list will always refer to the currently selected device. The trap overlay visibility may also depend on the selection, for more details refer to the section “Trap overlay”.
Toolbar

The trap steering toolbar controls the currently selected device and is composed of the following elements:
Position readout and axis locking,
Keypad,
Trap movement speed,
Stop movement,
Trap overlay.
Position readout and axis locking
The position readout can be viewed in the toolbar, and by clicking on it, the desired axis can be locked for specific actions:


When an axis is locked, the affected actions won’t move the trap along this axis.
In general, the axis lock only affects actions that don’t explicitly define their target position.
Axis lock affects:
The joystick,
The keypad,
Click-to-move.
Axis lock does NOT affect:
Clicking on waypoints – each one defines a target position.
FDCurve, Force Spectroscopy, Force Clamp, Active Trap Stabilization, or any other module that controls traps.
Python scripting – the target is part of the API:
mirror1.move_to(x=..., y=..., ...)ormirror1.move_by(dx=..., dy=..., ...).
Keypad
You can move the trap in steps by using the keypad found in the toolbar. In addition, you can select the size of the step in the input field.
Speed Controls
The speed can be viewed and configured in the toolbar. By default, the speed label shows the approximate speed of the device. Note: The actual speed of the trap depends on the accuracy of the steering device. Only for the high-resolution Trap 1 can an accurate motion in X/Y be guaranteed. In addition, the trap movement speed can be locked by clicking the speed button and selecting the desired speed in the slider or input field:


In general, the speed lock only affects elements that do not define their speed.
Speed lock affects:
The joystick. In this case, the speed will be constant at the fixed value regardless of the amount of deflection;
The keypad;
Speed lock does NOT affect:
Clicking on waypoints – each waypoint defines a desired speed;
FDCurve, Force Spectroscopy, Force Clamp, Active Trap Stabilization, or any other module that controls traps;
Python scripting – speed is part of the API:
mirror1.move_to(..., speed=...).
Stop movement
The button with a hand icon in the toolbar will stop any movement that is currently being executed by the selected trap.
Trap overlay

The trap overlay visibility can be controlled using the toolbar. There are 3 possible modes: Not visible, always visible, visible when the device is selected.


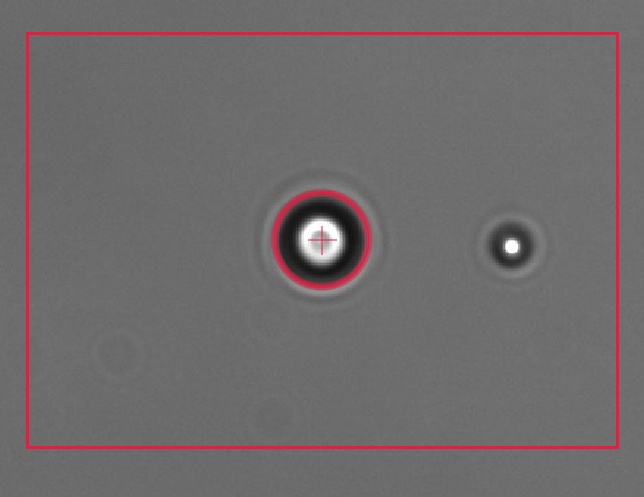
For trap 1, the rectangle drawn in the camera viewer indicates its range of motion in the field of view of the current camera. The circle with the crosshair indicates its current position.
The actual position of trap 1 depends on the 1+2 position, and one can move the overlay around by shift-clicking on the camera. Click-to-move can be achieved with ctrl-click on the overlay.
Z-slider

Visible when the selected device can move in Z (1+2 moves the focus of traps 1 and 2, nanostage will move the sample in Z dimension). The slider position represents the current Z position of the trap/nanostage, and moving it will immediately result in changes. The trap can be moved in steps by using the keypad with the size of the step given by the input field. The position readout can be clicked to lock the Z-Axis (refer to “Position readout and axis locking” for details of what is affected by the lock). The range of the device is also displayed. There is also a speed bar for Z movements (refer to “Movement speed” for more details).
Nanostage only

Instead of a speed bar (the Z speed is also controlled by the speed bar located in the toolbar), there is a “Set range” checkbox. This allows for reducing the range that the slider controls, allowing for more precise positioning.
Waypoints
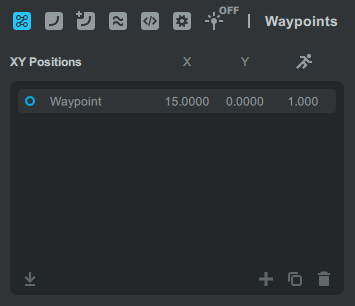
Waypoints are named positions in the trap range of motion. They are the easiest way to move to predefined points in your experiment.
Waypoints list

You can see all your waypoints in the waypoint list, which is scrollable. Waypoints can be freely reordered via drag & drop. You can also select waypoints by clicking them. You can edit the name, position or speed of a waypoint by double-clicking it. (Note: You need to hit enter to confirm the change).
On the lower part of the list, you can find a few tools to manipulate your waypoints. From left to right in the UI:
The
 button updates the position of the selected waypoint to the current position of the trap;
The
 button duplicates the selected waypoint;
The
 button creates a new waypoint using the current position of the trap;
The
 button deletes the selected waypoint.